
From Me: MaxxPeacock
Salam,
Bagi saya memancing dan photography memang tak dapat dipisahkan. Ini kerana setiap hasil tangkapan akan kita ambil gambarnya untuk di jadikan koleksi atau bukti tangkapan. Dari camera Compaq hingga la ke DSLR, camera tetap akan di bawa kemana-mana sahaja ketika memancing.
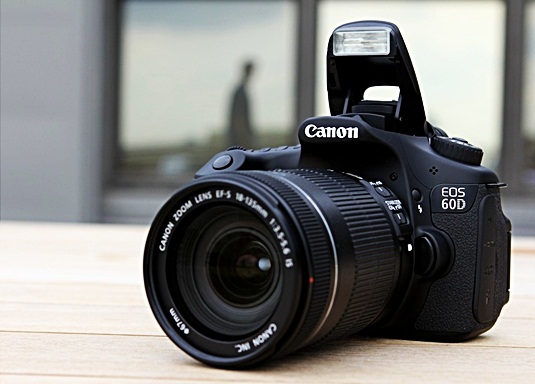
Saya yang memiliki DSRL jenis EOS Canon juga tidak berkecuali. Peluang mengambil gambar hasil tangkapan saya dan rakan-rakan tidak akan saya lepaskan. Selain itu saya juga gemar mengambil gambar-gambar panorama di sekeliling ketika memancing supaya tidak merasa jemu semasa menunggu ragutan ikan.
Sebagai penggunaan DSLR saya amat mementingkan kualiti gambar yang di tangkap.
Di ruangan ini akan saya sertakan tips-tips penggunaan dan teknik-teknik mengambil gambar menggunakan DSLR.
Tips-tips tersebut akan saya update dari semasa kesemasa. Semoga ruangan ini boleh membantu para pemancing supaya dapat menghasilkan gambar yang berkualiti.
Sekian
BasicYouMustKnow
(I.S.O.) is the abbreviation for the International standardization organization, a governing body based in Europe that provides the standards for a wide variety of subjects.also known as the film or digital cameras sensitivity speed, (The old name for ISO was ASA (The American Standard Association).
The ISO controls the sensitivity of the digital camera to light. A low ISO generally 100 can be used for shooting when there are good lighting conditions in a variety of lighting situations such as outdoors or indoors providing that there is enough light to get a good shutter speed and aperture (f-stop) combination. A low ISO generally will produce a clean image without digital noise ( digital noise is a dotty appearance in your image which can look like grainy colored dots that will reduce the appearance of detail or sharpness in your image, this can be even more apparent when you enlarge your images to larger sizes: 8.5×11.0, 11×14 and up. (In the film days this would have been called grain instead of digital noise.) When you are shooting pictures in darker lighting conditions generally you must increase the ISO and make the camera have a greater sensitivity to light when shooting in situations such as a cloudy, dark overcast day or indoors under lower lighting situations. In this case you can increase the ISO perhaps to 400 or higher. Just remember that as you increase the ISO higher you may increase the digital noise giving your images a dotty or grainy colored look in color digital photography.
Generally on many digital cameras such as Canon cameras there will be a button labeled ISO either on the top or the back of the camera and a thumb wheel close to the shutter release on the camera. If you push the ISO button and hold it in then toggle the thumb wheel back and forth, you will see on the digital display either on the top of the camera or on the back LCD display the various ISO’s that you can make changes to! (See your owners manual for your particular camera)
Shutter Speed: is the duration of time that your cameras shutter remains open: This can be either a fast shutter speed or a long shutter speed. Shutter speeds go from very fast speeds such as 1/8000 all the way down to 30 seconds on many digital cameras of today. 30 seconds being of a longer duration. On a Canon Camera the dial for shutter speeds is designated as Tv ( Meaning time Value) After you set this to Tv you can toggle your shutter speeds up or down with the thumb wheel that is generally located behind your shutter release button on your camera. As you toggle the thumb wheel back and forth notice the different speeds: 1/8000,1/6400, 1/5000,1/4000, 1/3200,1/2500,1/2000,1/1600.1/1250,1/1000,1/800.1/640,1/500,1/400,1/320, 1/250,1/200,1/160,1/125,1/100,1/80,1/60,1/50,1/40,1/30,1/25,1/20,1/15,1/13,1/10,1/8,1/6,1/5,1/4, of a second and lower. (The large numbers such as 1/8000 to 1/2000 of a second are very fast shutter speeds used for stopping extremely fast action such as a race car speeding by, a spaceship taking off or something that happens quick.
Long shutter speeds are used to capture images in lower light when you don’t have to stop as much action: Some examples are: shutter speeds from 1/4th of a second up to 1/30th of a second. Often we start with these speeds when we are shooting an image in lower light situations because the cameras shutter is open for a longer period of time. When shooting at these shutter speeds you need to hold your camera steady and put your elbows against your chest, take a deep breath in and hold it then push the shutter release in or put the camera on a tripod to steady it. ( Don’t forget to breathe regular again). Here are some scenarios that may help you: 1/60th of a second is a good starting point to stop action in; a person walking in a relatively slow walk can be successfully photographed clearly at that speed. So lets say from 1/60th of a second and higher ( 1/60th, 1/80th, 1/100th and up in shutter speed )
Aperture: ( Also known as lens opening ) Imagine holes or openings that go from large ( bigger to smaller):
F 1.4, F 2, F 2.8, F 4, F 5.6, F 8, F 11, F16, F 22, F32, These openings control the amount of light that reaches the sensor in the digital camera much in the same way that shutter speeds do but the iris or lens opening stays at a constant depending on the speed you set it for during the shot. Along with the various lens openings we have another thing to think about, Depth of Field. Depth of field governs what parts of our image are sharp and what parts of the image are out of focus. If you select a lens opening (aperture) also known as an F-Stop anywhere from F32 which is a small opening or wider up to f11 you will have a lone depth of focus. Imagine your looking over a table near the long end and have set up several cereal boxes standing up from one end of the table to the other or dominos standing up like soldiers one in front of the other. With one of the lens opening as we just suggested, if you focus your camera lens at the first box or domino you will generally have sharp focus from the front to the back cereal box or domino in the image.
If you were to take a picture at a larger lens opening or aperture such as f 1.4, f2, f2.8, f4 you will most likely achieve a shallow depth of focus where if you focus on the front cereal box or domino then the cereal boxes or dominoes closer to you will be in focus and the cereal boxes or dominoes going further would appear out of focus. The larger aperture’s are used in photography to get softer images in photographs such as portraits and wedding pictures as well as in images of children. Have you ever noticed how when you watch a movie or TV show, how depth of field is masterfully controlled by the camera men or camera women by using a larger (bigger, wider lens opening) this allows the characters in the scene to have most of the attention drawn to them and blurring out the background which can distract you from whats going on.On a Canon digital camera the way to set an aperture is to turn the upper dial usually to the Av mode, this will let you set the aperture first instead of the shutter speed.
Sumber: http://www.picturecorrect.com
Photo taken by Me


Macro


Portrait

Wedding

Wedding


Firework

Portrait

Macro
 Portrait
 Ray Of Light(ROL)
 Ray Of Light(ROL)
 Macro
Macro
 Scenery


Tiada ulasan:
Ulasan baru tidak dibenarkan.